When working with Windows Virtual Machines (VM’s) in Microsoft Azure, we can be assured that some essential security aspects of our machines configuration are handled for us automatically. An excellent example of this is disk encryption, which Microsoft automatically enables for us at rest on our machines using a platform-managed key. For most scenarios, this default option will serve us best and - most critically - will avail us of any problems in the future, should we decide to migrate our VM’s across into different subscriptions. For more comprehensive scenarios, we can instead turn to the Azure Disk Encryption solution, installable via an extension. We can use the following Azure RM template snippet to deploy this out into our resource group:
{
    "$schema": "https://schema.management.azure.com/schemas/2015-01-01/deploymentTemplate.json#",
    "contentVersion": "1.0.0.0",
    "parameters": {
        "vmName": {
            "type": "String"
        },
        "volumeType": {
            "type": "String"
        },
        "location": {
            "type": "String"
        },
        "encryptionOperation": {
            "type": "String"
        },
        "keyVaultURL": {
            "type": "String"
        },
        "keyVaultResourceID": {
            "type": "String"
        },
        "keyEncryptionKeyURL": {
            "type": "String"
        }
    },
    "resources": [
        {
            "type": "Microsoft.Compute/virtualMachines/extensions",
            "apiVersion": "2018-10-01",
            "name": "[concat( parameters('vmName'), '/AzureDiskEncryption')]",
            "location": "[parameters('location')]",
            "properties": {
                "publisher": "Microsoft.Azure.Security",
                "type": "AzureDiskEncryption",
                "typeHandlerVersion": "2.2",
                "autoUpgradeMinorVersion": true,
                "forceUpdateTag": "1.0",
                "settings": {
                    "EncryptionOperation": "[parameters('encryptionOperation')]",
                    "KeyVaultURL": "[parameters('keyVaultURL')]",
                    "KeyVaultResourceId": "[parameters('keyVaultResourceID')]",
                    "KeyEncryptionAlgorithm": "RSA-OAEP",
                    "VolumeType": "[parameters('volumeType')]",
                    "KeyEncryptionKeyURL": "[parameters('keyEncryptionKeyURL')]",
                    "KekVaultResourceId": "[parameters('keyVaultResourceID')]"
                }
            }
        }
    ]
}
In this scenario, as well as installing the above extension onto our VM’s, we must also provide an encryption key. As such, we have an additional dependency in this eventuality; a Key Vault resource with the appropriate secret value setup on it. While this does afford us some greater control and security over how our VM’s data is encrypted, this route does add a degree of complexity to our solution and can cause us some problems further down the line. Specifically, remember when I said how easy it was to move VM’s across subscriptions? In this case, if we’re using the above extension, we’ll get errors similar to these when we attempt this action:
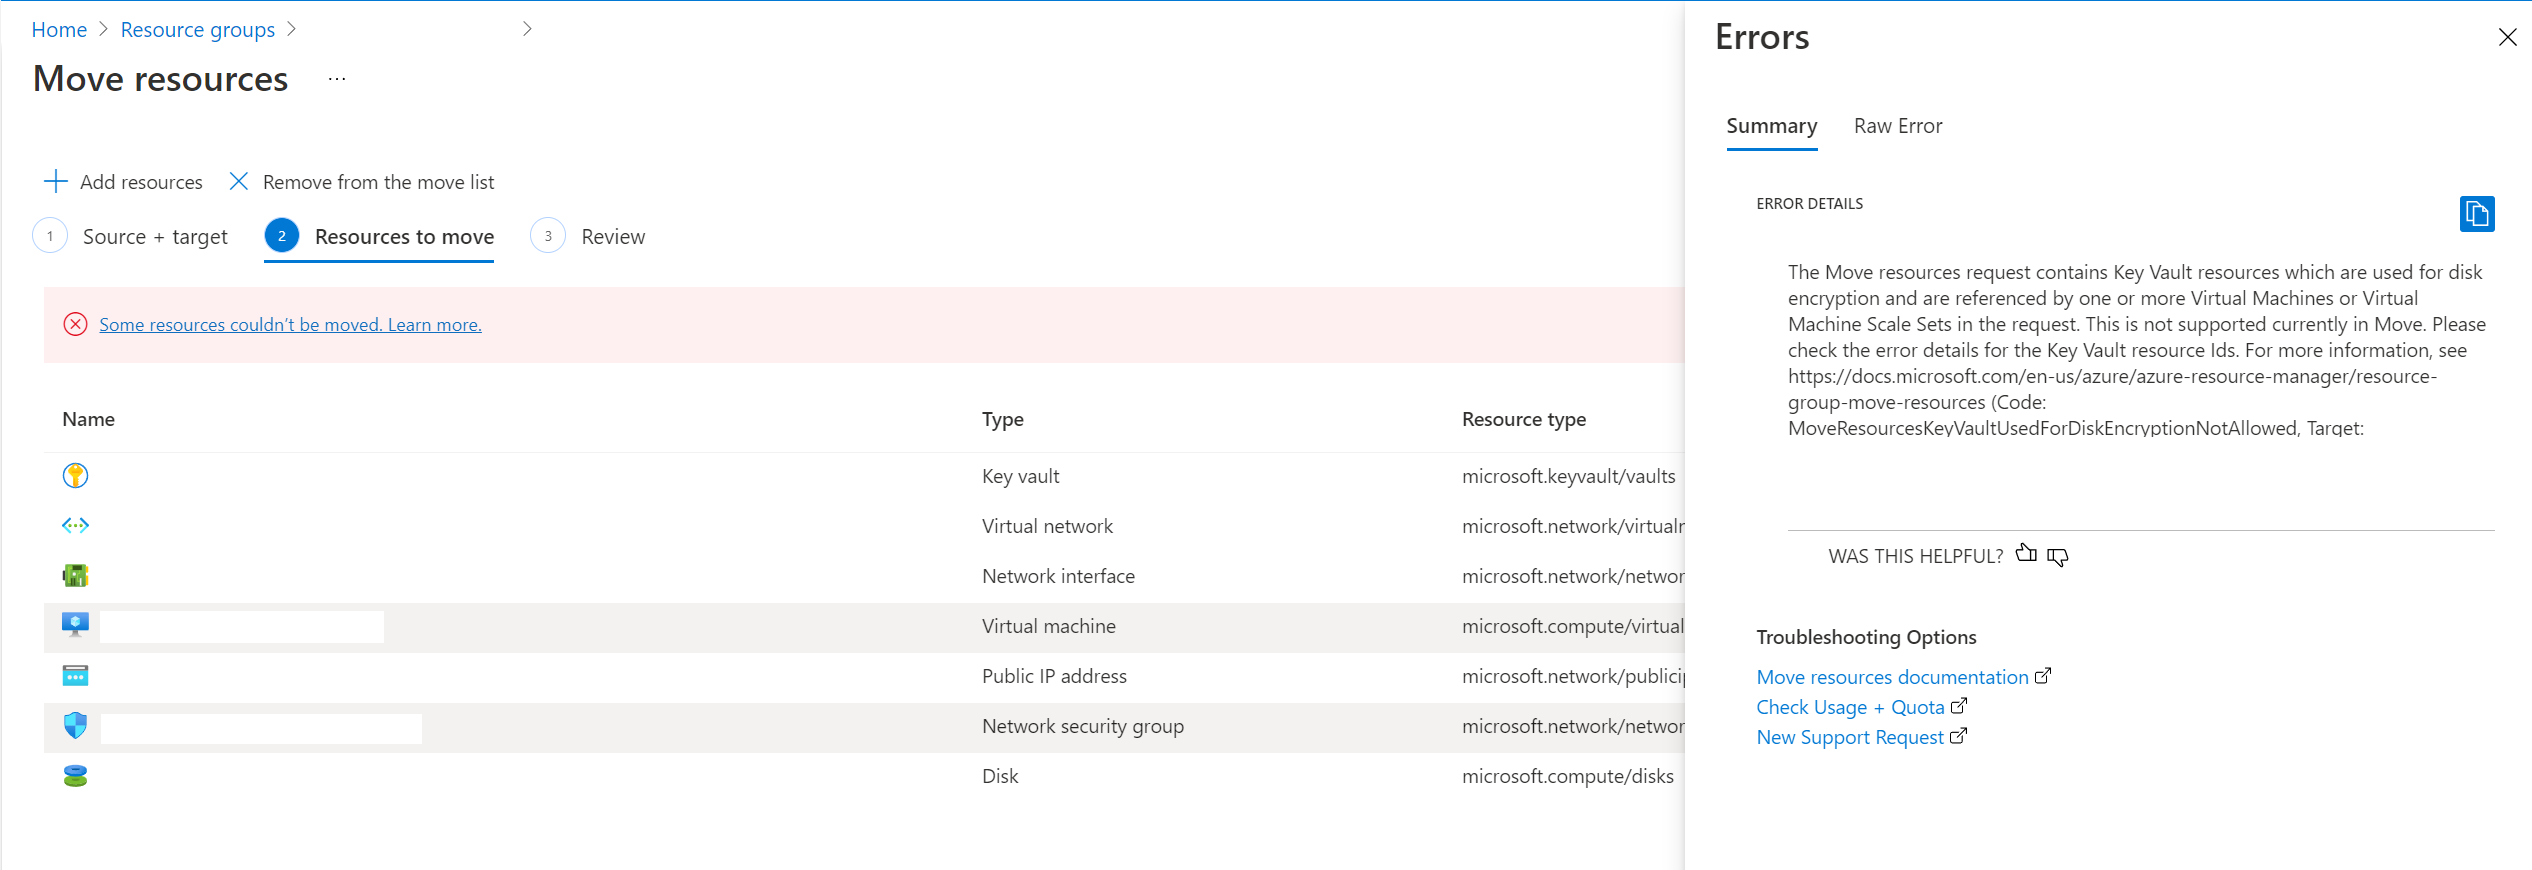
Thankfully, all is not lost - all we need to do is carry out the following steps to proceed with moving our VM to another subscription:
- Using the AZ PowerShell module, log in to the Azure subscription where your VM resides:
Connect-AzAccount #Login using modern authentication
Set-AzContext -SubscriptionId <My Subscription ID>
- Run the following cmdlet to disable encryption on the machine. Make a note of the following warning as well and ensure that you have shut down any critical applications on the operating system first:
Disable-AzVMDiskEncryption -ResourceGroupName "<My Resource Group>" -VMName "<My VM Name>"

- Proceed with migrating the resources, which should complete without incident. As part of the migration, ensure that you’ve included the Key Vault resource containing your encryption key.
- Once the migration has been completed, run the following set of cmdlets to change your target subscription and then re-enable disk encryption. Similar to disabling encryption, this may reboot the VM and take around 15 minutes to complete:
Set-AzContext -SubscriptionId <My Subscription ID> #Should be the Subscription ID where the resources have moved to
$RGName = "<My New Resource Group>"
$VaultName= "<My Key Vault Name>"
$KeyVault = Get-AzKeyVault -VaultName $VaultName -ResourceGroupName $RGName
$DiskEncryptionKeyVaultUrl = $KeyVault.VaultUri
$KeyVaultResourceId = $KeyVault.ResourceId
$VolumeType = "All"
Set-AzVMDiskEncryptionExtension -ResourceGroupName $RGName -VMName "<My NM Name>" -DiskEncryptionKeyVaultUrl $DiskEncryptionKeyVaultUrl -DiskEncryptionKeyVaultId $KeyVaultResourceId -VolumeType $VolumeType
With that done, you can sit back, relax, and be satisfied that you’ve completed your migration successfully. 🙂
As regular followers of the blog will know, I’ve been through a few tricky migrations in the past involving Microsoft Azure, and VM’s always seem to be the “problem child” as part of this. It’s good to see that some aspects of managing VM’s have improved significantly over time, such as with the introduction of managed disks. However, there will still be problems like this that we occasionally encounter, especially given the myriad of configuration options that could be different across VM’s. This “known unknown” emphasises the importance of having multiple environments for your critical Azure resources so that you can safely test and verify any tricky migration steps, such as the ones outlined in this post, before performing them against any business-critical infrastructure.